
Hand-Tooled Leather Belt Patterns: A Comprehensive Guide for Leatherworkers

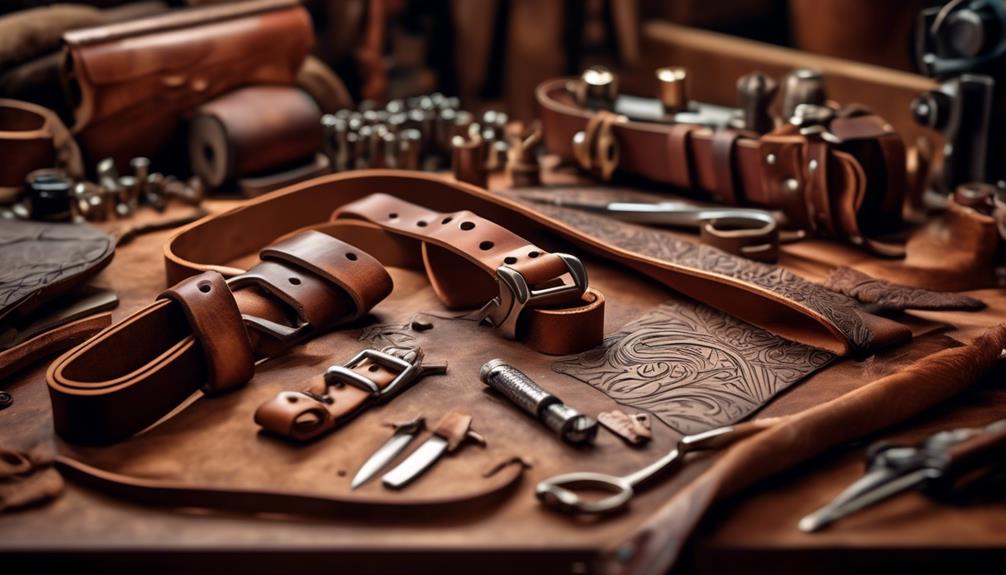 complete guide to leatherworking
Looking to elevate your leatherworking skills and create stunning hand-tooled belt patterns? The world of leatherwork holds an array of possibilities, and mastering the art of hand-tooling leather belts can open up a realm of creative expression.
With a comprehensive guide at your fingertips, you can explore intricate designs and techniques that will take your belt-making to the next level. Whether you're a novice seeking to expand your skill set or a seasoned leatherworker aiming to refine your craft, the secrets to crafting captivating hand-tooled belt patterns await.
History of Hand-Tooled Leather Belts
The history of hand-tooled leather belts spans centuries, reflecting a rich tradition of functional and decorative leatherwork influenced by diverse cultures and communities.
From the first two centuries onwards, artisans have used techniques like vine work and the swivel knife to craft intricate designs on leather belts. This tradition has been a sure way to showcase craftsmanship and storytelling through personalized and elaborate patterns.
Native American tribes, cowboys, and western settlers were among the first to embrace hand-tooled leather belts, each community adding its own cultural influence to the craft. The rise of the biker culture in the mid-20th century further popularized these belts as a symbol of individuality and group belonging.
Today, hand-tooled leather belts continue to honor the heritage of leather craftsmanship, serving as a canvas for personalized designs. Make sure to understand the historical significance of these belts, as they've been more than just a fashion statement; they represent a journey through time, carrying the stories and traditions of diverse communities.
Essential Tools for Leather Belt Tooling
You'll need basic tools like a swivel knife, wing divider, stylus, and clear packing tape for leather belt tooling. These tools are essential for tracing patterns, marking border lines, and beveling the leather.
Additionally, specialized carving tools like shading tools, veiner tool, and bar grounder tool are crucial for adding depth and texture to your leather belt tooling.
Basic Tools Needed
To commence leather belt tooling, ensure you have the essential tools, such as a swivel knife, wing divider, bevel tools, shading tools, and a bar grounder tool, to create intricate patterns and designs.
First, wet the leather and use a stylus or pen to trace the pattern. Protect the pattern with clear packing tape and use a wing divider to mark a straight border line.
Then, pull the straight border line using a swivel knife and pull the cuts for the design. Utilize a ball and larger bevel tool to bevel the border lines inwards and outside lines of the design.
Next, use shading tools to add depth and dimension to the design and a bar grounder tool to fill in background spaces.
These basic tools are fundamental for hand-tooled leather belt patterns and are essential for leatherworkers looking to create impressive designs.
Specialized Carving Tools
When creating intricate designs on leather belts, specialized carving tools are indispensable for achieving professional and detailed results.
These specialized carving tools include:
- Swivel knives: essential for cutting the design into the leather, providing guidelines for the tooling process.
- Beveling tools: add dimension and depth to the design by beveling the borders, lines, and inside of swirls.
- Shading tools and background fill tools: used to incorporate texture, depth, and contrast into the design, resulting in a realistic and polished look.
Each of these specialized carving tools plays a crucial role in achieving intricate and professional designs on leather belts, making them essential for leather belt tooling.
Types of Leather for Belt Making
Full-grain, top-grain, and genuine leather, as well as exotic options like alligator and ostrich, are common choices for crafting high-quality and unique leather belts.
When it comes to leather belt making, the type of leather used can greatly impact the belt's durability, appearance, and overall quality. Full-grain leather, with its natural markings and exceptional durability, is favored by many leatherworkers for creating long-lasting and rugged belts.
On the other hand, top-grain leather, known for its smooth and refined surface, is often chosen for more formal belt styles.
Genuine leather, while not as resilient as full-grain or top-grain, remains a practical and cost-effective option for crafting belts.
For those seeking a more exotic and luxurious appeal, alligator and ostrich leather offer an unparalleled aesthetic for hand-tooled leather belts. These exotic leathers can provide a striking and unique appearance, elevating the overall look of the belt.
Additionally, leatherworkers may also explore using wool felt as a lining material for added comfort and structure within the belt.
Design Inspiration for Hand-Tooled Belts
Look for design inspiration from nature, animals, and geometric shapes to create unique hand-tooled belt patterns. Consider incorporating traditional Western or Sheridan leather carving and tooling designs for a classic look. Experiment with dragon, sunflower, and floral patterns to add a distinctive touch to your hand-tooled belts. Explore leather tooling pattern packs for a variety of design options and possibilities. Don't be afraid to mix and match different leather tooling patterns to create a truly original belt design.
- Nature, animals, and geometric shapes offer endless possibilities for unique hand-tooled belt patterns.
- Traditional Western or Sheridan leather carving and tooling designs can add a classic touch to your belt creations.
- Dragon, sunflower, and floral patterns can bring a distinctive and eye-catching element to your hand-tooled belts.
- Leather tooling pattern packs provide a wide range of design options and inspire creativity.
- Mixing and matching different leather tooling patterns can result in truly original and personalized belt designs.
Techniques for Hand-Tooling Leather Belts
To master the techniques for hand-tooling leather belts, draw inspiration from the designs mentioned in the previous subtopic, such as nature, animals, and geometric shapes.
Begin by wetting the leather and tracing the pattern using a stylus or ballpoint pen. Protect the pattern with clear packing tape and mark the straight border line using a wing divider or ruler.
Use a swivel knife to pull the straight border line and make cuts for the design. Bevel the borders, lines, and inside of swirls using different sized bevel tools to create depth and dimension.
Additionally, add shading, texture, and background fill to enhance the intricacy of the design. By incorporating these techniques, you can achieve intricate and visually captivating hand-tooled leather belt patterns.
Experiment with different tools and techniques to create unique textures and effects that bring your designs to life. With practice and attention to detail, you can develop a mastery of techniques for hand-tooling leather belts, allowing you to create stunning and personalized pieces.
Adding Color and Finishing Touches
When adding color and finishing touches to your leather belt patterns, you can explore various techniques for applying color, such as dyeing, painting, or antiquing.
Consider adding embellishments like studs, conchos, or decorative hardware to enhance the overall look of your design.
These finishing touches can elevate the aesthetic appeal of your leather belts and make them stand out.
Color Application Techniques
Before applying color to your leather belt pattern, ensure that you protect the pattern on both sides using clear packing tape before transferring it onto the leather.
Once the pattern is secured, pull the straight border line using a swivel knife for a clean edge.
Bevel the borders, lines, and inside of swirls to create depth in the design.
Use shading tools to add texture and depth, especially in areas that display the underside of the design.
Utilize a bar grounder tool to fill in background spaces, giving your belt a polished and professional look.
- Pull the straight border line using a swivel knife.
- Bevel the borders, lines, and inside of swirls.
- Use shading tools to add texture and depth.
- Pay attention to areas that show the underside of the design.
- Utilize a bar grounder tool to fill in background spaces.
Embellishments and Hardware
Consider experimenting with different hardware and embellishments to elevate the look of your leatherwork, such as buckles, studs, rivets, and conchos. These elements can add a touch of personality and style to your hand-tooled leather belt patterns.
When choosing embellishments, think about how they'll complement the overall design and aesthetic of your project. Additionally, don't overlook the impact of dyeing and staining your leather to add depth and character. Experiment with different colors and finishes to achieve the desired look. You can also use leather paints and dyes to add intricate designs and patterns, such as floral motifs, geometric shapes, or personalized monograms.
Tips for Creating Unique Belt Patterns
To create unique belt patterns, experiment with different shapes and motifs to achieve a custom look that reflects your personal style and creativity. Consider incorporating personal elements or symbols into your designs for a truly custom look.
Explore mixing and matching different tooling techniques to achieve distinctive patterns. Don't be afraid to think outside the box and draw inspiration from various sources. Utilize shading, texture, and decorative cuts to enhance the visual appeal of your belt patterns.
- Experiment with different shapes and motifs
- Incorporate personal elements or symbols
- Mix and match different tooling techniques
- Draw inspiration from various sources
- Utilize shading, texture, and decorative cuts
Troubleshooting Common Belt Tooling Issues
If you've encountered issues with achieving your desired belt patterns, troubleshooting common belt tooling issues can help you identify and address any problems in your leather tooling work. Properly transferring patterns and mastering tools like the swivel knife are crucial for successful leather tooling.
If you're having trouble with pattern transfer, ensure that your leather is cased properly and use a stylus to trace the design onto the leather. Beveling the borders, lines, and inside of swirls is essential for a professional-looking design.
If you're facing challenges with beveling, practice controlling the pressure and angle of the beveling tool to achieve consistent results. Adding shading and texture can elevate your leather tooling, but it requires attention to detail and technique. Experiment with different swivel knife angles and pressure to master shading.
Background fill techniques and decorative cuts are important aspects of leather tooling that greatly impact the final appearance of your project. If you're struggling with these techniques, practice on scrap leather and seek guidance from experienced leatherworkers.
Showcasing Your Hand-Tooled Belt Designs
To showcase your hand-tooled belt designs effectively, pay attention to the finishing touches and presentation of your work. Here are some key tips to enhance the presentation of your hand-tooled belt designs:
- Finishing: Ensure that the edges of the leather belt are smooth and well-finished to give a professional look.
- Hardware: Select high-quality buckles, rivets, and other hardware that complement the design and style of your hand-tooled belt.
- Photography: Capture high-resolution images of your hand-tooled belts from various angles to showcase the intricate details and craftsmanship.
- Packaging: Consider using custom packaging or branded boxes to add a sense of luxury and exclusivity to your hand-tooled belts.
- Branding: Incorporate your logo or signature onto the belt, either by tooling it directly onto the leather or using custom metal tags for a personalized touch.
Frequently Asked Questions
What Does Hand Tooled Leather Mean?
Hand tooled leather means creating designs on leather using hand tools and techniques.
First, the leather is wetted, then a pattern is traced, and a swivel knife is used to cut the design.
Beveling adds depth, while shading and texture create contrast.
Background fill tools polish the design.
This process results in unique, handcrafted leather pieces with intricate and personalized patterns.
Which Side of Leather Do You Tool?
You tool the grain side for that rugged, textured look, and the flesh side for intricate detailing. Consider the finish and project type when choosing.
The grain side's natural variations are great for belts and larger items, while the flesh side is perfect for smaller, detailed work.
Thickness and flexibility of the leather matter, so experiment on scrap pieces to find the best side for your project.
How Do You Make Leather Tooling Stand Out?
To make leather tooling stand out, there are a few steps you can follow:
- Use a stylus or pen to transfer the pattern onto the leather. This will ensure accuracy and help guide your tooling process.
- Once the pattern is transferred, protect it with clear tape. This will prevent the pattern from smudging or getting damaged during the tooling process.
- To add depth and dimension to your design, bevel the borders. This involves using a beveling tool to create a sloping edge along the borders of your pattern.
- Shading is another technique that can enhance your tooling. Use shading tools to add shading or shadows to certain areas of your design. This will create a more realistic and three-dimensional effect.
- Background spaces can be filled in using a bar grounder tool. This tool helps create a polished look by adding texture or pattern to the background areas of your design.
How Hard Is Leather Tooling?
Leather tooling can be likened to a challenging puzzle – it requires precision and patience. Achieving intricate designs involves tracing patterns, using a swivel knife, and adding shading for depth.
It's not easy, but with practice, you'll master decorative cuts and create polished, professional finishes. Understanding tooling techniques is key. With dedication, you'll find the process rewarding, and your leatherwork will stand out with a unique touch.
Conclusion
In conclusion, this comprehensive guide for leatherworkers provides the perfect primer for creating captivating and customized hand-tooled leather belt patterns.
By exploring the history, tools, and techniques of belt tooling, you'll be able to add color and finishing touches with finesse.
With these tips and tricks, you'll be showcasing your stunning, unique belt designs in no time.
So grab your tools and get ready to transform plain leather into picturesque patterns!