

Properly tightening the chain on your chainsaw is essential for safety and optimal performance. A loose chain can derail or break, while an overtightened chain strains the engine. This guide will teach you how to get your chainsaw chain tension just right.
Keeping proper tension on your chainsaw chain is very important for performance and safety. Don’t overtighten. Make adjustments with the saw cooled down and the engine off. Proper tension prevents derailing, improves cutting efficiency, and reduces wear. Take a minute to check and adjust tension regularly to extend chain life.
Read this complete step-by-step guide about how to tighten a chainsaw chain and why it’s important.
Why Proper Chain Tension Matters
Proper chain tension is critical for chainsaw performance and safety. A loose chain can derail or break, increasing kickback risk.
Overly tight chains overload the engine and wear bars and sprockets prematurely. Correct tension improves cutting efficiency, prevents kickback, extends chain life, and ensures smooth operation. Checking tension should be part of regular saw maintenance.
Keeping your chainsaw chain at the ideal tension provides several key benefits:
- Improves cutting efficiency – With the right tension, the chain fully engages the wood without resistance or binding. This allows smooth, fast cuts.
- Prevents kickback – A loose chain can jump off the bar and strike the operator. Correct tension keeps the chain secure and stable.
- Extends chain life – The proper tension reduces friction and prevents undue stress on the chain. This allows it to stay sharp longer.
- Reduces bar wear – Too loose or too tight of a chain wears the guide bar unevenly. Good tension ensures even contact with the bar.
- Avoids chain derailment – Excessive slack can cause the chain to come completely off the bar, creating a dangerous situation.
- Enhances safety – With the chain firmly on the bar, you have full control over the cutting tool. This gives you confidence while operating the saw.
How to Check Chain Tension
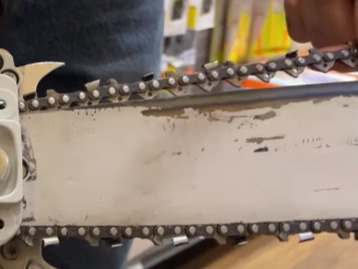
Checking chain tension is quick and easy. Use the “lift test” by lifting the chain off the bar near the tip and releasing it.
The chain should snap back against the bar. For a more precise check, measure sag by pulling down the chain and measuring the distance to the bar. Then lift it and measure again. The difference is the slack, which should match your saw’s specifications.
Before each use, check the chain tension using these simple methods:
The lift test – Turn off the saw and lift the chain away from the bar near the nose. It should have just enough play to lift away slightly then snap back when released. If the chain is loose enough to hang down, it needs tightening.
The pull test – Hold the bar nose up and pull the chain around it by hand. You shouldn’t be able to pull the drive links out of the bar. If you can, the chain is too loose.
The sag test – Look underneath the guide bar with the saw off. The chain should hug the bar with no visible sagging or drooping on the bottom.
The spin test – The chain should rotate smoothly around the guide bar by hand, without tight spots or resistance.
How to Tighten a Chainsaw Chain
Start by disengaging the brake and loosening the bar nuts. Locate the tension screw, often on the side. While lifting the bar tip, turn the screw clockwise until the chain is snug but still movable by hand.
Hold the tip up and tighten the bar nuts. Test tension and make further adjustments if needed. Refer to your manual for model-specific steps. Proper tension is key for performance.
Once you’ve determined that the chain needs tightening, follow these steps:
Step 1. Loosen the Bar Nuts
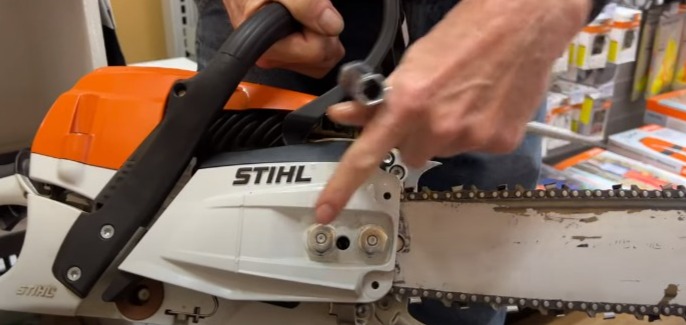
The side cover nuts must be loose enough for the bar to move for tension adjustments. Loosen them 1-2 full turns using the scrench or a wrench.
Step 2. Locate the Tensioning Screw

This is usually on the side of the saw near the clutch cover. Refer to your owner’s manual if unsure.
Step 3. Lift up on the bar tip
Hold the tip of the guide bar up to prevent sagging during adjustment. This ensures proper tension when tightened.
Step 4. Turn the Tension Screw Clockwise

Use the scrench to turn the tension screw clockwise. This will pull the bar forward and tighten the chain.
Step 5. Test the Tension

Check chain tension as described above. The chain should be snug with little up and down movement on the bar.
Step 6. Tighten Down the Bar Nuts

While continuing to hold up the bar tip, tighten the side cover nuts with the scrench.
Step 7. Confirm Adequate Tension
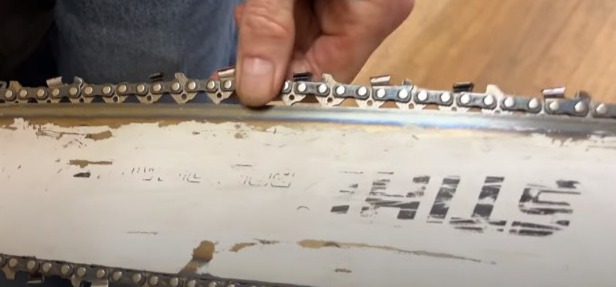
Do a final manual test of the chain tension before starting the saw. Make sure the chain still moves freely by hand.
Signs Your Chain is Too Tight
An overtightened chain won’t rotate freely by hand. It may cause the saw to struggle when cutting or overheat.
Too much tension can also increase vibration, wear sprockets unevenly, break the chain, and damage the engine. Back the tension off if you notice these issues until the chain has a bit of wiggle room. A tight chain risks performance problems.
While some play in the chain is normal, it is possible to overtighten it.
Signs that the chain tension is too high include:
- The chain feels very rigid and inflexible
- Tension screw will not turn any further
- Chain links do not move or rotate smoothly
- Engine struggles or dies when chain engages
- The chain heats up quickly while cutting
- Increased vibration while running
- Excessive chain oil consumption
If you notice these issues, back the tension screw off a quarter turn at a time until the chain has a bit of wiggle room.
When to Tension the Chain
Check tension before each use and every tankful of gas when operating. Tension is also needed after installing a new chain, when the chain feels loose, if cutting to one side, or when sagging excessively.
A loose chain indicates tensioning is needed. Also, check after hitting obstructions. Regular tensioning compensates for chain stretch under load.
Check the chain tension in these situations:
- Before starting any new cutting project
- After installing a new chain
- Every tankful of gas during operation
- If the saw begins to cut unevenly or bind
- When the chain feels loose by hand or eye
- After hitting an obstruction while cutting
Ideally, you should assess and adjust chain tension every 15-20 minutes of active cutting time. This helps compensate for chain stretch under load.
Troubleshooting a Loose Chainsaw Chain
If your chain keeps loosening, inspect for worn components. Look for elongated, stretched chains along with worn sprockets and guide bars. Replace damaged parts and check sprocket mounts and bar straightness.
A loose tensioner mechanism may need repair. Ensure you have the proper pitch and gauge chain. Regular cleaning, lubrication, and tensioning will maximize chain life.
If your chain keeps loosening repeatedly, here are some things to inspect:
- Worn chain – Chains naturally stretch from use over time. Replace excessively elongated chains.
- Damaged guide bar – Look for burrs, rough spots, and rail wear. File down any defects.
- Loose sprocket – The drive sprocket should not wobble. Tighten its mounting nut if loose.
- Bent bar – Lay the bar on a flat surface to check for bends. Replace bars that are not straight.
- Faulty tensioner – The tension screw or mechanism may be stripped or broken. Have it repaired.
- Wrong chain size – Make sure you have the correct pitch and gauge chain for your saw.
Regularly monitoring and adjusting your chainsaw chain tension takes just a minute and makes a big difference in how well your saw runs. Follow this guide to help keep your chain in optimal condition. Let us know if you have any other chainsaw maintenance questions.
FAQs about How to Tighten Chainsaw Chain
1. How can I tell if my chainsaw chain is dull?
Signs of a dull chain include having to force the saw through the cut, smoking or burning wood, choppy cuts, and sawdust instead of chips. Dull cutters will be rounded and the depth gauges often get too low from filing.
2. Should I tension the chain with the engine hot or cold?
Always tension the chain with the engine cold. The heat from use expands the metal and loosens the chain. If tensioned hot, it will be too tight when cooled down.
3. What size file do I need to sharpen my chainsaw chain?
Use a round file sized to match your chain – 1/8″ smaller than the chain pitch. For example, a 3/8 pitch chain takes a 5/32 file. Use a file guide to ensure the correct filing angle.
4. Can I remove a damaged drive link without taking apart the chain?
Yes, you can use a chain breaker tool to remove damaged sections of the chain by driving out the rivets. Just make sure to replace the link to keep the chain continuous.
5. Should I use the same chain oil as my 2-stroke gas mix?
No, chain oil must have tacky adhesion properties to stick on the bar and chain. Regular 2-stroke mix won’t stay on and lubricate properly. Always use quality bar and chain oil.
6. How often should I rotate/flip my guide bar?
Rotate the guide bar every couple of chain replacements so it wears evenly. Check for rail wear each time you tension the chain. Flipping the bar helps it wear evenly on both sides.
7. Can I hand file my chainsaw chain?
Yes, you can sharpen chainsaw chains using a hand file and guide. Go slow and use a light touch. Follow the existing angle and file all cutters equally. Don’t take off too much metal.
8. What causes chainsaw kickback and how can I avoid it?
Kickback happens when the upper quadrant of the bar nose contacts wood or an object. Avoid kickback by keeping the tip guard against the wood, don’t overreach, and don’t cut with the nose.
9. Should I use a full chisel or semi chisel chain for my firewood saw?
Semi chisel chain stays sharp longer when cutting dirty wood. A full chisel is faster but needs more frequent sharpening. Either will work, just maintain the chain well regardless of type.
10. Can I swap sprockets to change the pitch on my chainsaw?
No, the sprocket must match the guide bar and chain pitch. Mixing pitches risks the chain jumping teeth and damaging the saw. Stick with the manufacturer’s recommended pitch components.
Key Facts
Properly maintaining chain tension is critical for safe and effective chainsaw operation. Before each use, check that the chain is snug but can still be pulled around the bar by hand. Use the scrench or screwdriver to turn the tension screw clockwise to tighten a loose chain.
When adjusting, always lift up on the bar tip to prevent sagging. Tighten the chain just enough that it does not sag but still moves freely. Do not overtighten, as this can overload the engine. Make tension adjustments with the saw cooled down.
Remember to tighten the bar nuts while holding up the bar tip. Check the tension of every tank of gas during use. A loose chain can derail or break. Regular adjustment compensates for chain stretch over time.
- Check tension frequently, especially with new chains
- The chain should be snug but still movable
- Don’t overtighten, which can damage the saw
- Tighten when cool, not when hot after use
- Lift the bar tip while adjusting for proper tension
- Turn the screw clockwise to tighten, counterclockwise to loosen
Properly maintaining your chainsaw chain by monitoring tension, replacing it when worn, and filing periodically will allow you to get years of use from your saw. Follow this guide to master chainsaw chain care. Let us know if you have any other chainsaw or chain questions.